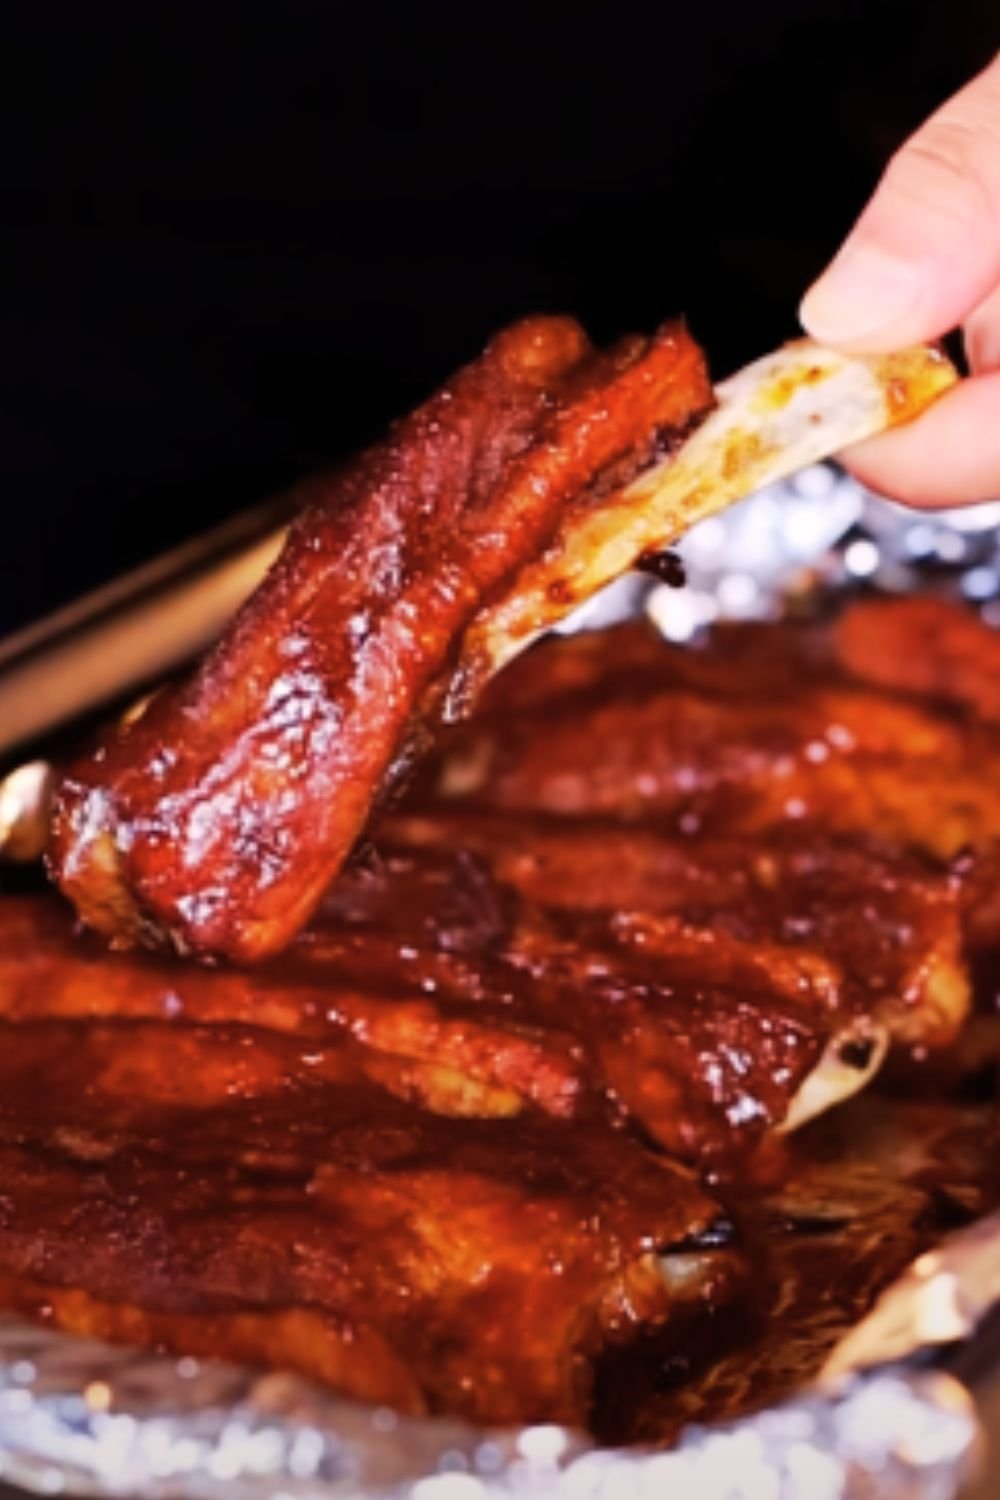
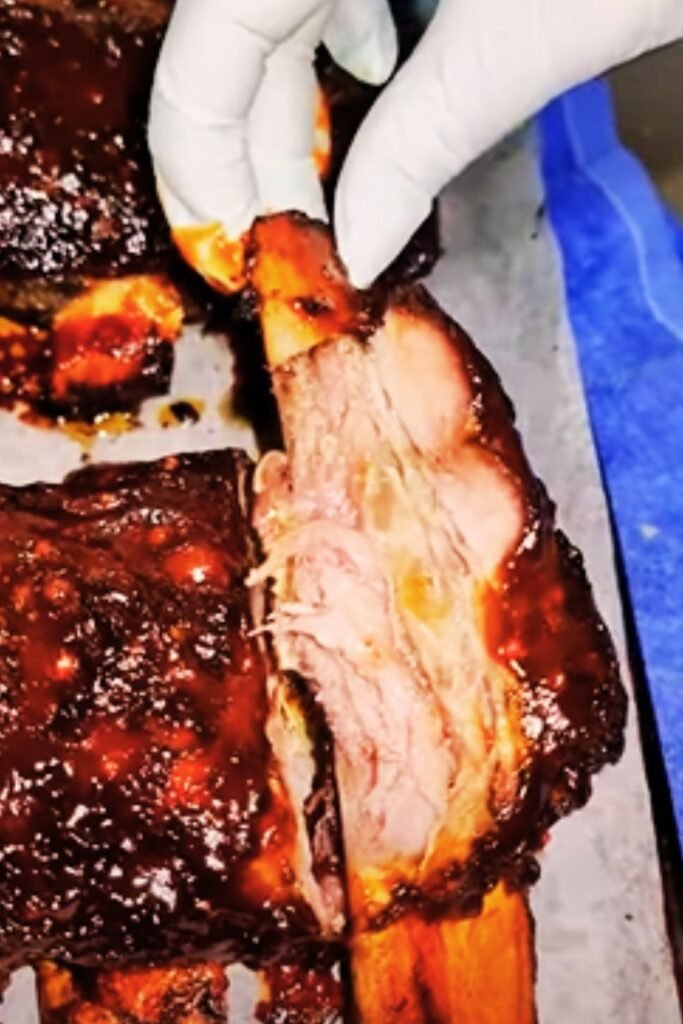
Nothing beats the satisfaction of perfectly cooked ribs that literally fall off the bone. While many believe achieving this tenderness requires a smoker or grill, I’m here to share my foolproof method for creating incredibly tender, flavorful ribs right in your oven. After years of testing and perfecting this technique, I can confidently say these oven-baked ribs rival any barbecue joint’s offerings.
Essential Ingredients
For the Ribs:
- 2 racks of baby back ribs (2.5-3 pounds each)
- 1/4 cup yellow mustard
- 1/2 cup apple cider vinegar
For the Dry Rub:
- 1/4 cup brown sugar
- 2 tablespoons smoked paprika
- 2 tablespoons garlic powder
- 2 tablespoons onion powder
- 1 tablespoon black pepper
- 1 tablespoon kosher salt
- 1 teaspoon cayenne pepper (adjust to taste)
- 1 teaspoon dried thyme
For the Mop Sauce:
- 1 cup apple juice
- 1/4 cup apple cider vinegar
- 2 tablespoons butter, melted
- 1 tablespoon dry rub mixture
Equipment Needed

- Large baking sheet
- Heavy-duty aluminum foil
- Meat thermometer
- Sharp knife
- Basting brush
- Paper towels
- Mixing bowls
- Measuring spoons
- Small spray bottle (optional)
Preparation Time Breakdown
| Stage | Duration |
|---|---|
| Membrane Removal | 5-10 minutes |
| Rub Preparation | 5 minutes |
| Initial Seasoning | 10 minutes |
| Resting Time | 2 hours |
| Cooking Time | 3-4 hours |
| Resting After Cooking | 15-20 minutes |
| Total Time | 6-7 hours |
Step-by-Step Instructions
1. Preparation (2 hours before cooking)

The key to perfect ribs starts with proper preparation. I’ve learned that taking time with this step makes a significant difference in the final result.
- Remove the ribs from the refrigerator 2 hours before cooking
- Pat them dry thoroughly with paper towels
- Remove the membrane from the bone side:
- Slide a knife under the membrane at one end
- Grip with a paper towel
- Pull steadily to remove in one piece
- Apply yellow mustard all over (this helps the rub stick and creates a beautiful crust)
2. The Dry Rub Application
Mix all dry rub ingredients in a bowl. I’ve found that applying the rub in layers helps create a more complex flavor profile:
- First layer: Apply 1/3 of the rub, focusing on the meat side
- Second layer: Apply 1/3 on the bone side
- Final layer: Reserve for later use
Let the rubbed ribs rest at room temperature for 30 minutes before cooking.
3. Cooking Process
Preheat your oven to 275°F (135°C). This low-and-slow cooking temperature is crucial for achieving that fall-off-the-bone texture.
First Phase (2 hours):
- Place ribs on a foil-lined baking sheet, meat side up
- Create a loose foil tent over the ribs
- Cook for 2 hours undisturbed
Second Phase (1 hour):
- Remove foil tent
- Baste with mop sauce every 20 minutes
- Apply remaining dry rub at the 2.5-hour mark
Final Phase (30-60 minutes):
- Check internal temperature (target: 190-203°F)
- Baste one final time
- If desired, broil for 3-5 minutes for extra caramelization
Troubleshooting Common Issues
| Problem | Cause | Solution |
|---|---|---|
| Tough ribs | Cooking temperature too high | Maintain steady 275°F |
| Dry meat | Overcooked or insufficient basting | Use mop sauce regularly |
| Rubbery texture | Membrane not removed | Ensure complete membrane removal |
| Burnt exterior | Too close to heating element | Adjust oven rack position |
| Lacking flavor | Insufficient seasoning time | Allow full 2-hour rest with rub |
Storage and Reheating
Store leftover ribs properly to maintain their quality:
- Refrigerate within 2 hours of cooking
- Wrap tightly in foil or plastic wrap
- Store for up to 4 days
- Freeze for up to 3 months
Reheating method:
- Preheat oven to 250°F
- Wrap ribs in foil with a splash of apple juice
- Heat for 20-30 minutes until warmed through
Serving Suggestions
- Classic coleslaw
- Baked beans
- Corn on the cob
- Mac and cheese
- Roasted vegetables
- Southern-style cornbread
- Sweet potato fries
Nutritional Information (per serving)
| Nutrient | Amount |
|---|---|
| Calories | 580 |
| Protein | 45g |
| Fat | 38g |
| Carbohydrates | 12g |
| Fiber | 1g |
| Sugar | 8g |
| Sodium | 890mg |
Expert Tips
- Never boil ribs before baking – this strips them of flavor
- Let ribs rest for 15-20 minutes after cooking
- Cut between bones using a sharp knife for clean portions
- Save pan drippings for an incredible sauce base
- Use a meat thermometer for perfect doneness
Frequently Asked Questions
Q: Why won’t my ribs fall off the bone?
A: The most common reason is insufficient cooking time or temperature. Ensure you’re cooking at 275°F and reaching an internal temperature of at least 190°F. The collagen needs time to break down properly.
Q: Can I make these ribs ahead of time?
A: Yes! Cook them until they’re nearly done, then refrigerate. Finish them under the broiler just before serving.
Q: Should I wrap my ribs in foil the entire time?
A: No, the foil tent should be removed during the final cooking phase to allow the surface to caramelize.
Q: How many servings does this recipe make?
A: Two racks of baby back ribs typically serve 4-6 people, depending on portion size and sides.
Q: Can I use spare ribs instead of baby back ribs?
A: Yes, but cooking time will need to be increased by 30-60 minutes due to their larger size.
Q: What’s the purpose of the yellow mustard?
A: The mustard helps the rub adhere to the meat and creates a better bark. Don’t worry – you won’t taste it in the final product.
Q: How can I add a smoky flavor without a smoker?
A: Add 1-2 teaspoons of liquid smoke to your mop sauce, or increase the amount of smoked paprika in your rub.
Variations to Try
Feel free to experiment with these tested variations:
- Asian-inspired:
- Replace dry rub with Chinese five spice
- Use hoisin sauce for basting
- Finish with sesame seeds
- Spicy Southwest:
- Add chipotle powder to the rub
- Use Mexican oregano
- Incorporate ground coffee into the rub
- Herb-crusted:
- Add fresh rosemary and thyme
- Increase garlic content
- Finish with herb-infused butter
Remember, the key to perfect ribs is patience. Don’t rush the process, and you’ll be rewarded with tender, flavorful meat that truly falls off the bone.